
Creating the fingerboard and "dummy set up"
Smart people do dummy setups!

The fingerboard of the original Salter had ebony veneered sides and an ivory veneered top. You can see a similar setup on one of Perry’s English Guittars.

Obviously I can’t use real ivory as that would be horrific, not to say illegal. There are sources of mammoth ivory, but I didn’t like the idea of doing anything in ivory. After serious thought about alternatives, I decided to do all ebony veneer. This means making a core with the correct compound radius (64.5mm at the fingerboard end to allow for 1.5mm veneer resulting in 66mm).
Then the sides are tapered, once again to 1.5mm less on each side. I make the correct taper and then use a marking gauge to mark 1.5mm top and bottom and then carefully plane down, making sure the sides are square to the bottom of the fingerboard.
I then glue on the sides overheight, before carefully restoring the top curve.

The veneer is then carefully planed and scraped down to 1.5mm thickness. To bend it, steam the top side above a boiling pan. This causes the upper surface to expand, bending along the grain to the perfect shape.
The veneer needs to dry and cool in this shape before gluing, or it will crack. There are two ways of clamping it to the fingerboard:
Make a caul, or
Use old bicycle inner tubes to “lash” it.
The second option is much quicker, but you have to be more precise because you need to have about 0.5mm overhang only on both sides. I used fish glue which is great for this use case - long open time but very tacky.

I make the fingerboard considerably oversize and then cut it down from below to the correct height for the instrument. This is where the “dummy” setup comes in.
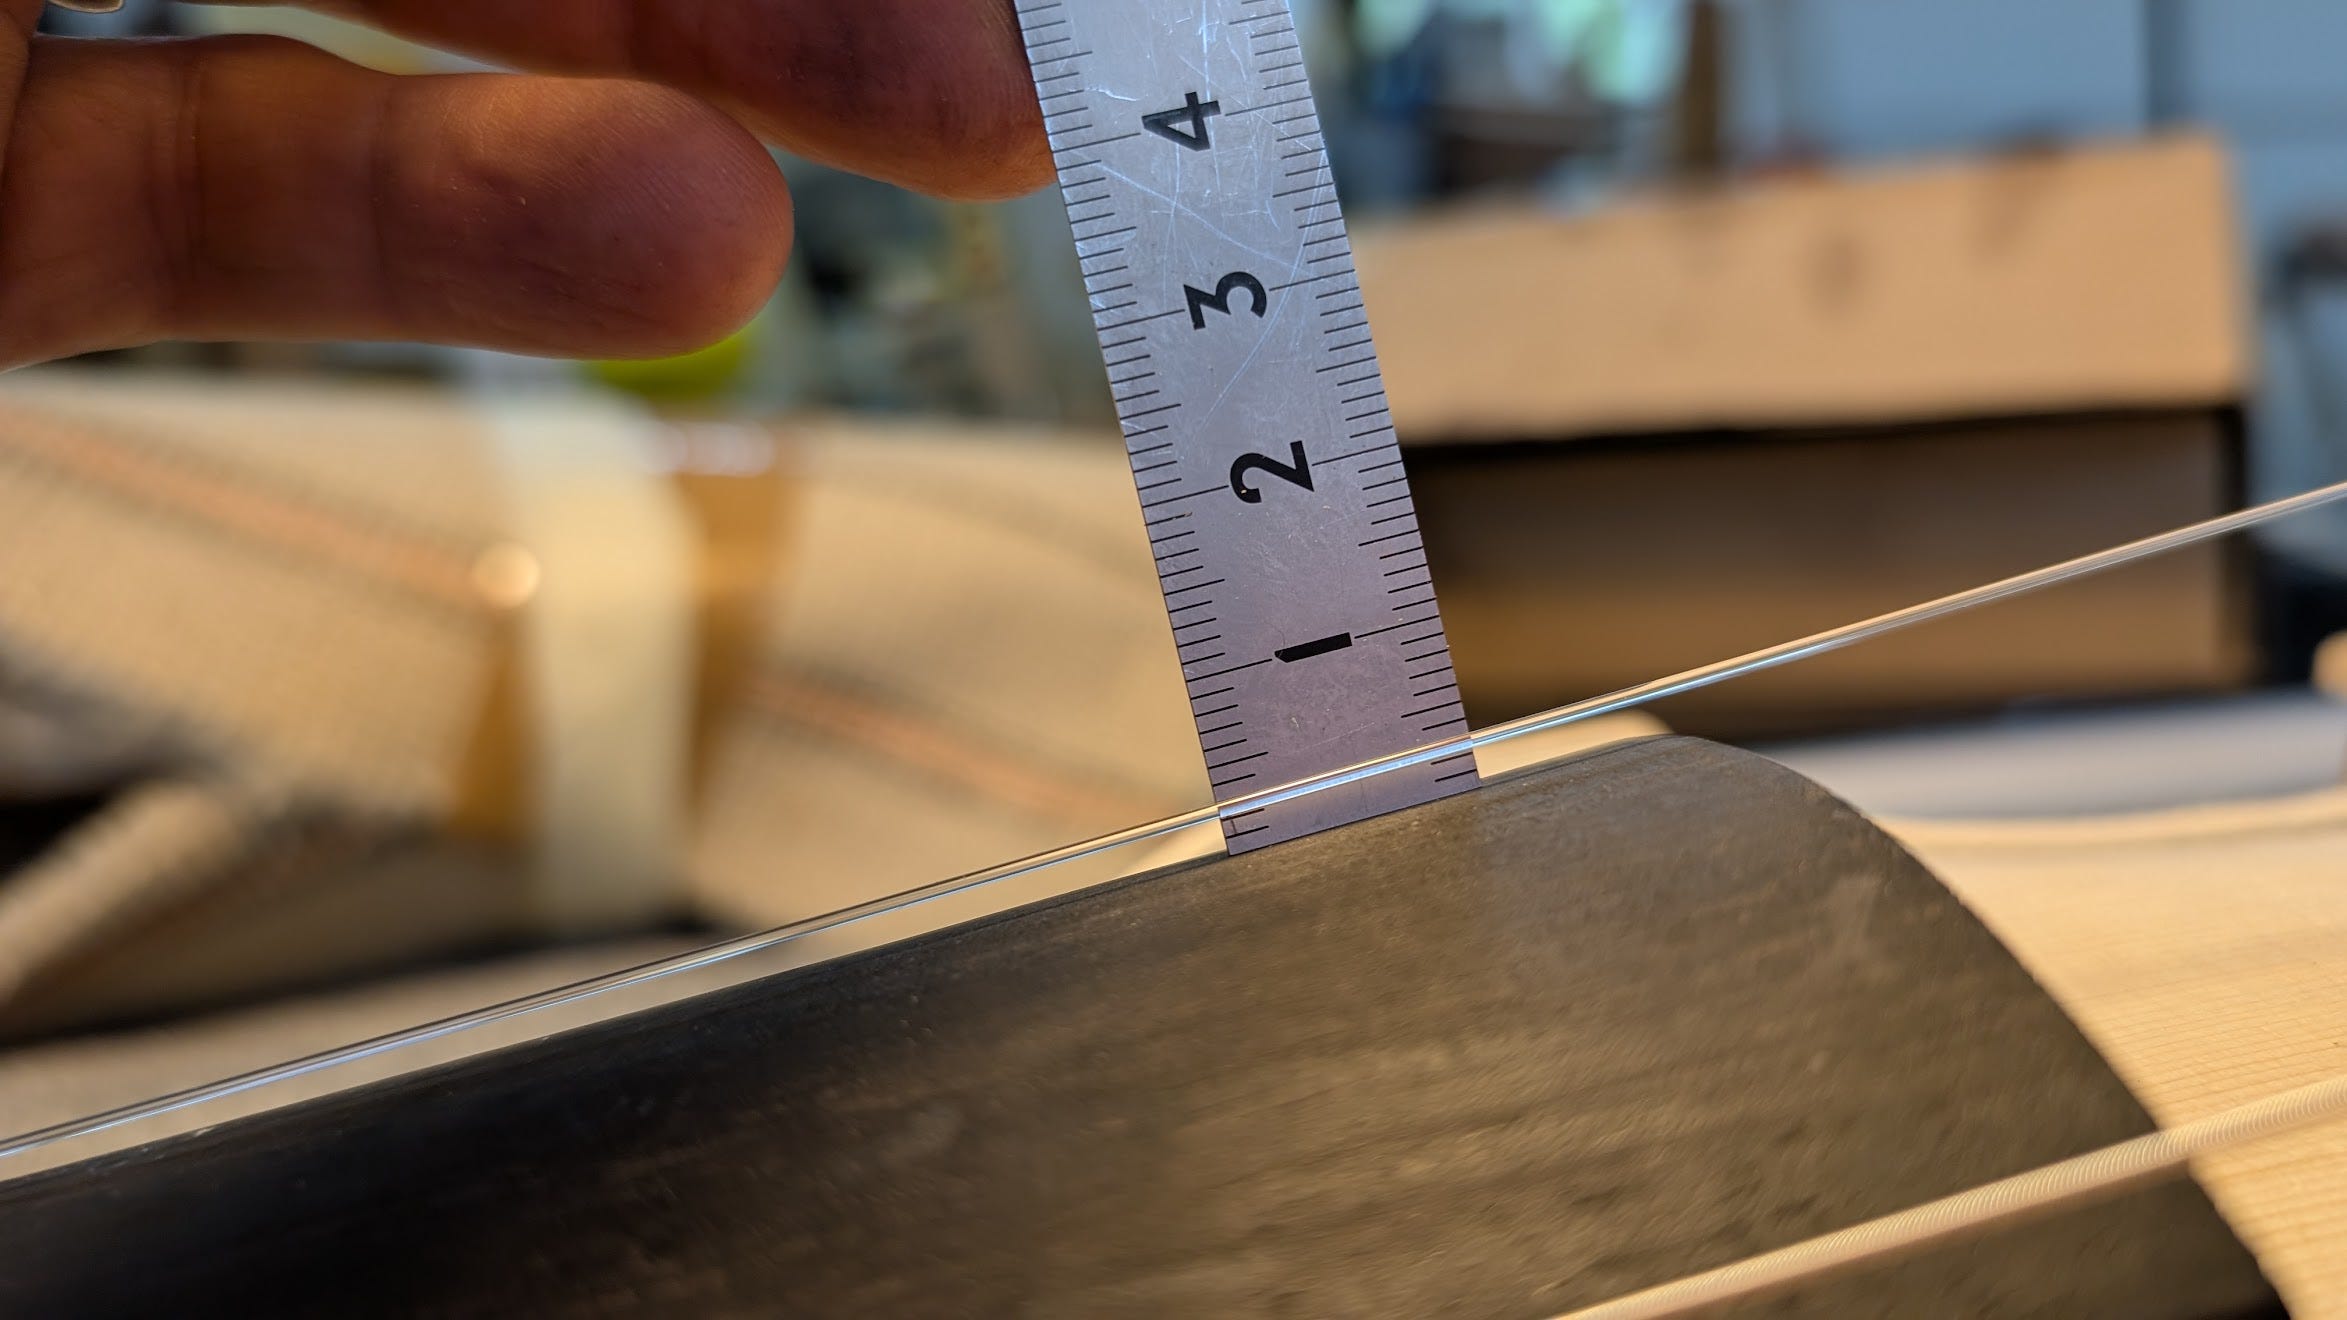
Of course when fitting the neck I calculated the neck angle (using both maths and a drawing). However, this is still not 100% exact. We can correct for this during setup by raising or lowering the bridge and nut, but its nice to get the fingerboard size correct too.
The dummy setup is simply the instrument setup with a treble and bass string, a simple temporary nut, bridge, tailpiece and endpin.

This lets me see how everything is going to work and measure the gap between the strings and the neck. Once this is done, the fingerboard can be carefully cut down and then planed to fit under the strings with the correct action at the nut and end of the fingerboard. I roughly plane it held in a pattern maker’s vice before getting it finally flat using a plane held upside down.

This prevents the fingerboard from warping as you plane it. You can also use the plane’s sole as a reference surface when making a small fingerboard like this.
Once the fingerboard fits perfectly, the underside needs to be shaped from the end of the neck to the end of the fingerboard, which removes weight and gives a lovely profile.
I also had to think carefully about shaping the sides of the veneered fingerboard. Normally on a viol the shaping would happen once glued, but viols don’t have veneered sides usually. I realised I needed to do some shaping before gluing while I could still see the thickness of the remaining veneer. Fingers crossed this works out!

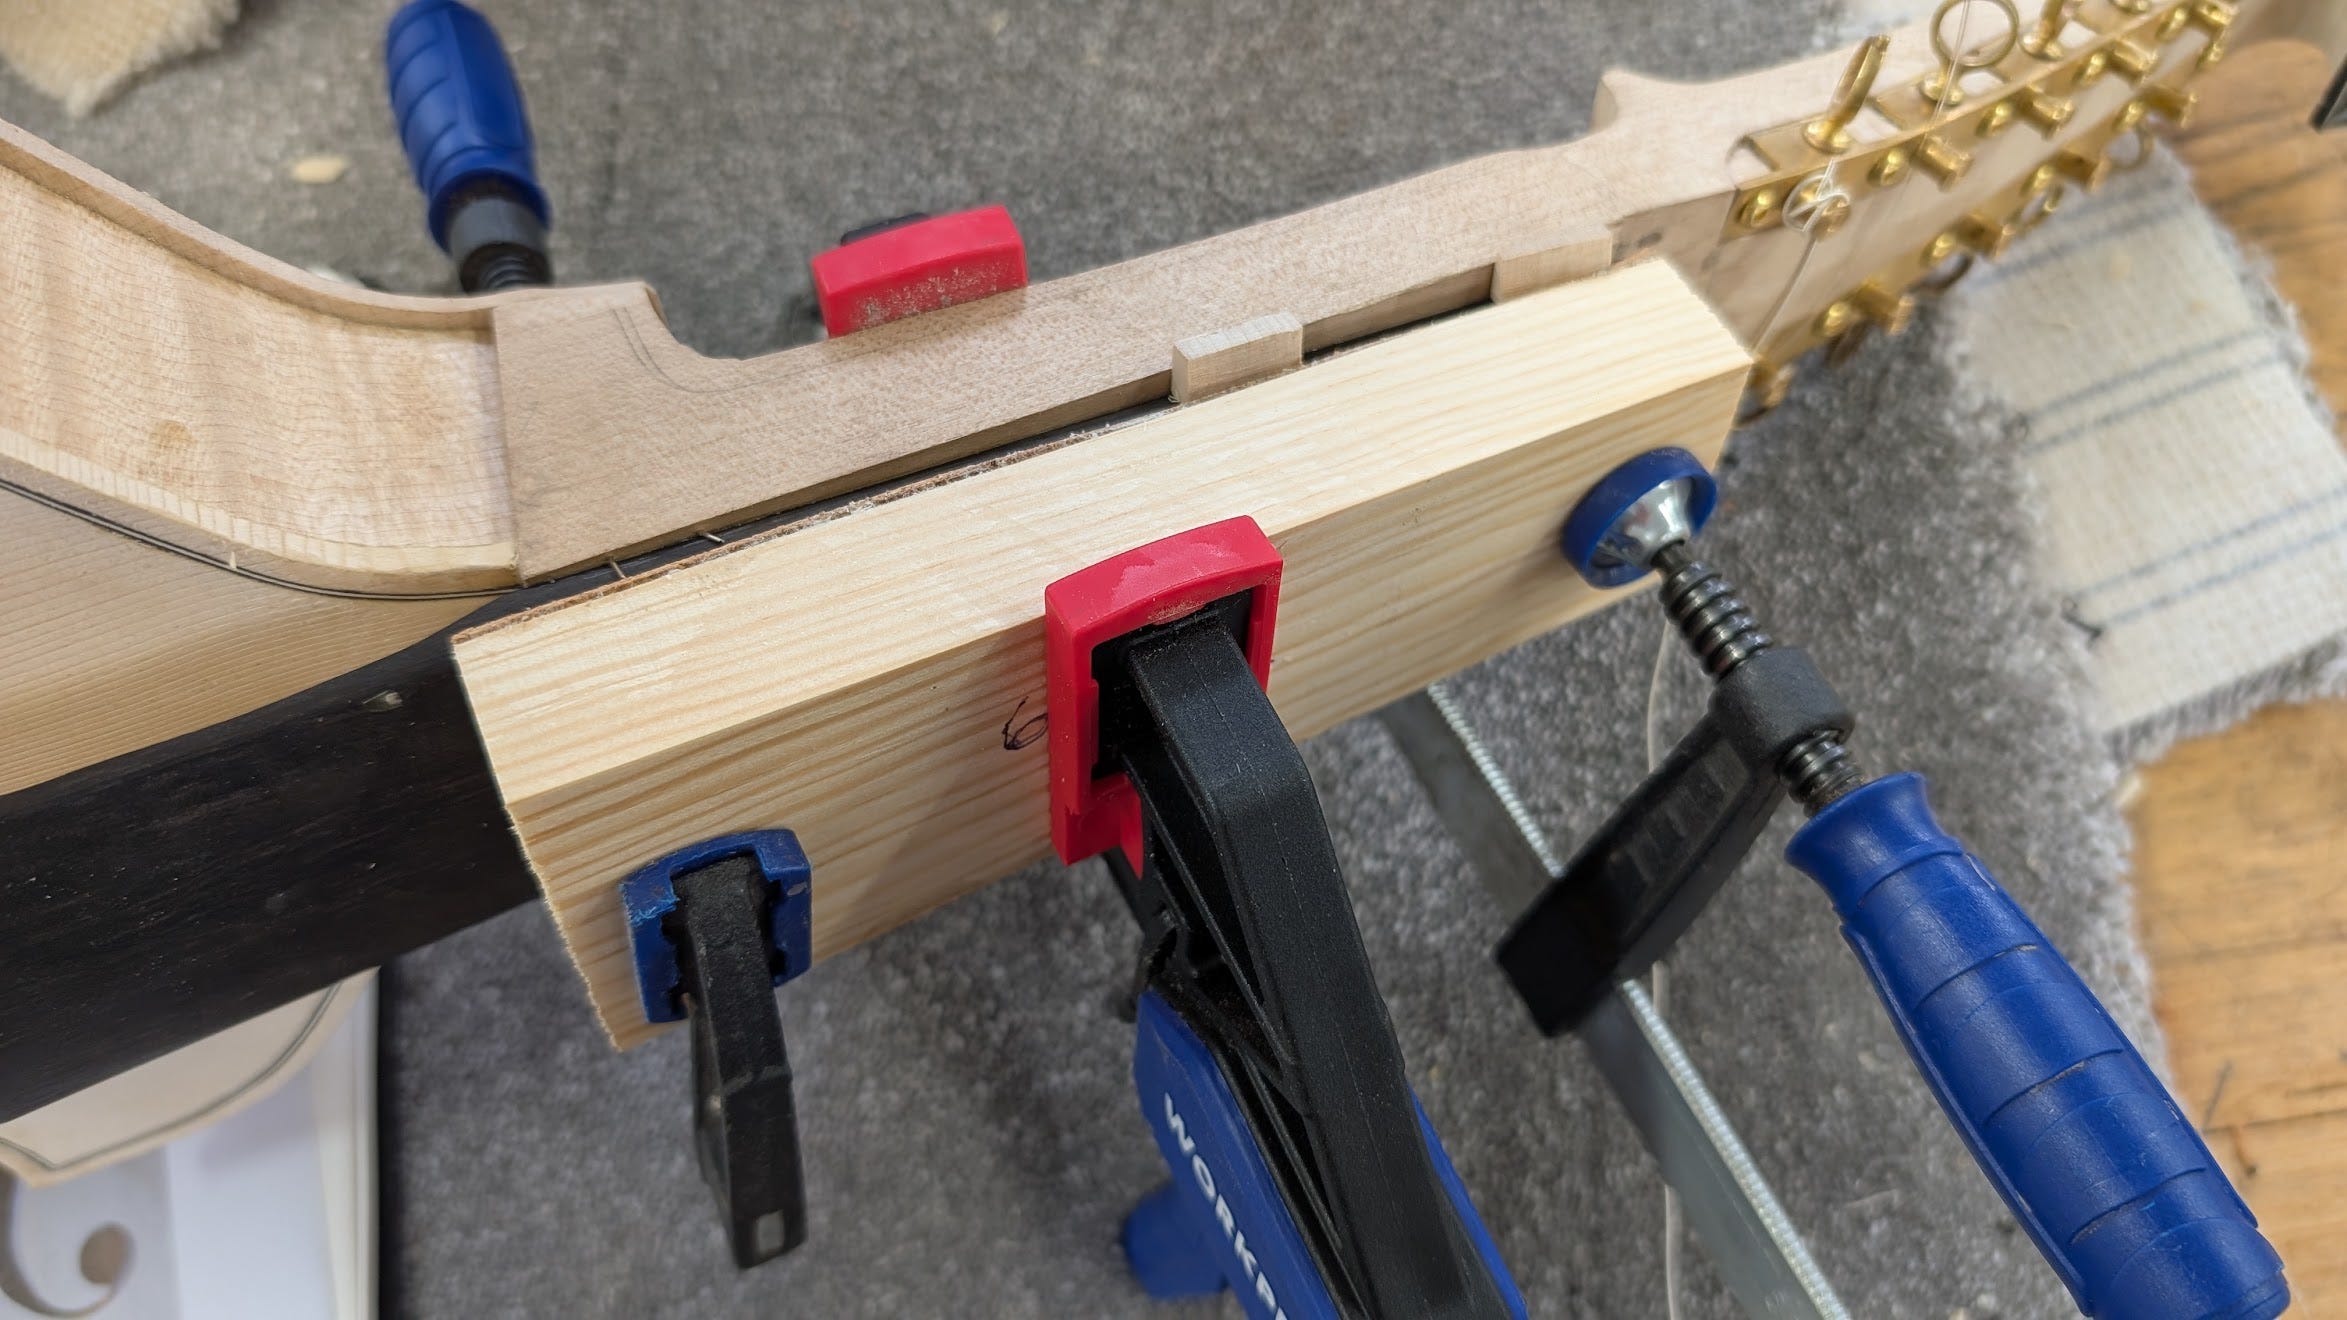
A guitar fingerboard would have locator pins on the first and 12th fret, but that won’t work here. Some makers use cut off sharpened pins in the same way, but I like to hollow a channel on the underside of the fingerboard, which means the pins would have to be at the sides where there is less wood.

So instead a few blocks of wood glued to the top of the neck will make sure the fingerboard fits in exactly the same place when glued. This requires leaving enough width in the neck to cut down afterwards. It is easiest to see a picture to explain:

One advantage of the dummy set up is that you can position the fingerboard very precisely using the strings to ensure everything is lined up (assuming you have the dummy bridge and nut in exactly the right spot!).
Although I didn’t make a caul for the fingerboard veneer, I do always make a caul for gluing on the fingerboard. Here it is gluing.
Many thanks to my tutor Arnaud Giral (https://www.instagram.com/arnaudgiral_luthier) who showed me this approach. All the mistakes are my own though as he is away this week!